Tales from the Red Dragon Inn Chapter 1 Walkthrough in Shortened Steps
Here is a condensed Chapter 1 walkthrough of the game Tales from the Red Dragon Inn.
See below for other resources for the game:
Spoiler Alert! Jumping to this book ahead of other chapters will result in SPOILERS!
Other Tales from the Red Dragon Inn Resources:
Chapter 1 Walkthrough Summary
Reference Manual
Chapter 1 Scenario Book Summary
Chapter 2 Scenario Book Summary
Chapter 3 Scenario Book Summary
Chapter 4 Scenario Book Summary
Chapter 5 Scenario Book Summary
Our overview page of Tales from the Red Dragon Inn explains what the game is about and shares reviews and videos on the web.
Tales from the Red Dragon Inn is a campaign game with content that unlocks over the course of the story. Do not open any game components until you are instructed to do so!
Open these components now!
(Note that some components are in the box marked “Open this first!”)
Gauntlet Setup
- Read Setup Section of each scenario book after Prologue of each scenario.
- Set Up the Map:
- Locate map in Maps Folder, marked “01-Danger Room Debacle”.
- Each scenario has a unique map.
- Leave maps in the folder until needed to avoid spoilers.
- Epic Pool Card & Door Tokens:
- Set up Epic Pool card.
- Place door tokens on six door spaces on the map.
- Scheme Blocks & Schemers:
- Right side of the map has three Scheme Blocks.
- Scheme Blocks dictate actions of game-controlled figures (Schemers).
- Each Scheme Block represents a different type of Schemer.
- Use cardboard punchout standees for each Schemer type.
- Color Bases & Schemer Setup:
- Scenario book table specifies color bases and number of Schemers.
- Limit indicates max Schemers on map at one time.
- Slot standees into listed color bases.
- For Scenario 1:
- Gizmoblins (numbers 1-5) into blue bases.
- Robogre (number 1) into red base.
- Sparking Engine (number 1) into yellow base.
- Place standees near respective Scheme Block.
- Build Tracker Decks:
- Tracker deck randomizes Schemer placement order and tracks damage.
- Match cards to number and color of each standee.
- Keep color decks separate.
- For Scenario 1:
- Blue tracker deck: shuffle cards marked 1-5.
- Red and yellow decks: each have one card.
- Place decks near corresponding Scheme Block and standees.
- Initiative Tokens:
- Take Initiative Token for each Schemer color.
- Set tokens near the map.
- Found at the bottom of page 1.
- Content unlocks as the story progresses.
- Do not open any game components until instructed to do so.
Deployment
- Deploying Schemers:
- Use lettered deployment spaces on the map.
- Focus on the first room, The Gauntlet.
- Refer to the “Deploy” section in the scenario book for details.
- Deployment Table:
- Indicates number and type of figures and tokens based on the number of Heroes.
- Deploying Schemer Figures:
- Reveal a random card from the Schemer’s tracker deck.
- Place the matching numbered standee in the first deployment space listed.
- Repeat for each listed space.
- Sort revealed tracker cards in ascending order and place them near the matching Scheme Block.
- Deploying Traps:
- Take a Trap token and place it on the appropriate deployment space.
- Stack damage tokens on the Trap until they equal the listed damage.
- Traps are dangerous spaces that can deal damage to figures.
- Final Steps:
- After deployment, place a purple Scheme Die near the Gizmoblin Scheme on the side of the map for future use.
Heroes
Hero Setup:
- Refer to “Heroes” section in scenario book.
- Specifies Hero and Item cards and any other setup steps.
Hero Selection:
- Choose a Hero you find fun for Scenario 1.
- Choice is not permanent; can swap Heroes each scenario.
- All Heroes gain new abilities and access to same equipment pool throughout the campaign.


Hero Components:

- Hero Mat:
- Two-sided; shows unique abilities, attributes, and Fortitude (damage threshold).
- Ensure mat is on the Fresh side.
- Power Tree:
- Oversize card matching Hero mat’s color scheme and icon.
- Used starting in Scenario 2.
- Ability Cards:
- Start with two Hero ability cards and one Item card.
- Cards have Setup Flags: Charge (&), Shield ({), Damage Boost (|).
- Place corresponding tokens near Hero mat.
- Initiative Token:
- Randomizes turn order for Heroes and Schemers.
- 1 Player: Play as two Heroes or use Solo Mode (Appendix B, page 10 of Reference Manual).
- 2 Players: Use gold-border full and red-border partial initiative tokens.
- 3 or 4 Players: Use only gold-border full initiative token.
- Figure:
- Marks the Hero’s space on the map.
- Deploy on specified spaces unless otherwise instructed.
Hero-Specific Content:
- Eve’s Illusions:
- Create Illusions to distract Foes.
- Illusions are Friendly and can be targeted by Attacks.
- Use white standee bases for Illusions.
- Gerki’s Backstab:
- Deal massive damage by positioning.
- Gain Backstab bonus if conditions are met (adjacent to Friendly figure, on Hazard/Difficult Terrain, or with Debuff Tokens).
- Zot and Pooky:
- Pooky assists Zot; has his own Hero Mat.
- Pooky is Tiny and Avoided (can share spaces, ignored by Schemers).
- Roll Pooky’s Scheme Die to determine his actions.
- Zot can activate Pooky before, during, or after his turn.
Map Features
Unique Maps:
- Each scenario has a unique map with specific obstacles.
Map Features Section:
- Descriptions and graphics of map features highlighted in this section.
- Scenario-specific details provided.
Common Mechanics:
- Certain features, like spaces preventing movement, have consistent color outlines throughout the campaign.
Review Descriptions:
- Read the description of each map feature in the scenario book for detailed understanding.
Round Gameplay
Overview
- Scenario Rounds:
- Played across multiple rounds.
- Each round has three phases.
- “Playing the Round” section on each map provides scenario-specific steps.
- Phases:
- Ready Phase:
- Bookkeeping tasks.
- Remove counters.
- Set up Schemes.
- Put initiative tokens into the bag for the Combat Phase.
- Combat Phase:
- Heroes and Schemers take turns battling.
- Heroes (players) move, fight, and attempt to achieve Objectives using abilities.
- Schemers (game-controlled) follow Schemes to Defeat Heroes.
- Phase ends when no initiative tokens are left in the bag.
- Objective Phase:
- Check Objectives and Win Conditions.
- Specific details for Scenario 1 are provided in the scenario book.
- Ready Phase:
Ready Phase (Scenario 1)
- Invigorate All Abilities:
- Each Hero removes 1 Cooldown Token from each ability with tokens.
- Cooldown Abilities gain tokens when used.
- Use the ‘Invigorate X’ ability on Hero mat to remove up to X Cooldown Tokens from any abilities.
- Roll Scheme Dice:
- Choose a player to roll Scheme Dice for each type of Schemer with figures on the map.
- Roll each die one at a time for each Schemer type.
- Place the die on the matching Scheme for that figure type.
- All figures of a type use the same Scheme each turn.
- If playing as Zot, also roll Pooky’s Scheme Die.
- Example: Roll purple Scheme Die for Gizmoblin, get Claw, place on “ERROR: Menacing taunt not found!” Scheme.
- Fill the Initiative Bag:
- Add initiative tokens for each Hero and each type of Schemer with figures on the map to the initiative bag.
- Use one initiative token for each Schemer type, regardless of the number of figures.
- In 1- and 2-Hero games, each Hero uses two initiative tokens.
Combat Phase
Overview:
- Figures take turns maneuvering and attacking.
- Turn order is randomized by drawing initiative tokens from the initiative bag.
- Phase ends when the initiative bag is empty, moving to the Objective Phase.
Resolving Initiative:
- Choose a player to draw and resolve initiative tokens.
- Draw one token at a time to determine the next turn.
Drawing Initiative Tokens:
- Hero’s Gold-Border Full Initiative Token:
- Hero’s player gets 2 Action ability tiles and 1 Shenanigan ability tile.
- Hero takes their turn.
- Schemer Group’s Initiative Token:
- All figures in that Schemer Group take a turn, one at a time.
- Tokens match the colors of Scheme Blocks on the map.
- Hero’s Red-Border Partial Initiative Token (2-Hero Game):
- Hero’s player gets 1 Action ability tile.
- Hero takes a partial turn.
Turn Details:
- Players take turns as their Heroes, using ability tiles and performing actions.
- Schemer Group turns are resolved afterwards, following their Scheme instructions.
Player Turns
Using Abilities:
- Abilities are on Hero mat and Hero/Item cards.
- Number and type of abilities used depend on ability tiles available (determined by initiative token drawn).
- Flip ability tiles to grey “used” side when using abilities.
- Abilities are identified by the ability bar at the top of each card’s text box.
Order of Abilities:
- Use abilities until tiles run out or you decide to stop.
- Actions and Shenanigans can be used in any order, one at a time.
Types of Abilities
Actions

- Primary abilities for significant impact (attacks, utility cards, movement).
- Use only if an Action ability tile is available to flip.
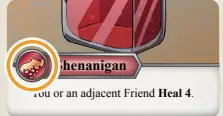
Shenanigans

- Minor extra abilities.
- Can be used by flipping an Action ability tile or a Shenanigan ability tile.
- Some characters may not have Shenanigan abilities in Scenario 1 but will unlock new abilities later.
Reactions

- Respond to specific game events (e.g., being attacked or taking damage).
- Can be used on your turn or other figures’ turns, interrupting other abilities or Schemes.
- Only use when their specific trigger occurs.
- Optional; not required to use when triggered.
Charge, Cooldown and Discard Costs
- Ability Costs:
- These costs prevent repeated use of powerful abilities.
- Three types: Charge, Cooldown, and Discard.
Charge:

- Limits total uses per scenario.
- Place Charge Tokens (&) on cards during setup.
- Return one & token to supply to use ability.
- Can use multiple times per turn if charges remain.
Cooldown:
- Time delay between uses.
- Add Cooldown Tokens (^) each time ability is used.
- Cannot use ability while ^ tokens are on it.
- Use cooldown cost (number next to ^ icon) to determine how many ^ tokens to add.
- If cost is 0 or tokens are removed by game effect, ability can be used again on the same turn.
Discard:
- Can only be used once per scenario.
- Remove card or token from play after use.
- Abilities are regained in the next game.
Multiple Abilities on Same Card:
- Each ability on the card or mat pays its cost separately.
- Currently applies only to Hero mat, but may apply to new cards unlocked throughout the campaign.
Resolving Abilities
- Follow steps in the card’s text box from top to bottom.
- Resolve each effect as completely as possible.
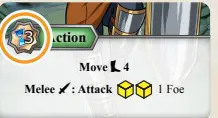
Attacking
- Understanding Attack Cards:
- Format: [Type] : Attack [Damage] [Target]
- Type: Range or area affected by the attack.
- Damage:
- Number of dice
- Specific amount
- Number of dice with a modifier
- Target: Limits attack to a specific number of Foes or specifies the area of potential targets.
- Performing an Attack:
- Declare Targets:
- Identify the target(s) of your attack.
- Determine Damage:
- Calculate the damage based on the attack’s description.
- Deal Damage:
- Apply the determined damage to the target(s).
- Use Harm Effects:
- Apply any additional harmful effects specified by the attack.
- Remove Defeated Targets:
- Remove any targets that have been defeated from the game.
- Declare Targets:
Declare Targets
Attack Types:
- Melee:
- Targets Foes in adjacent spaces.
- Ranged:
- Targets Foes in adjacent spaces or up to X spaces away.
- No penalty for targeting adjacent Foes.
- Draw a Line of Fire for the attack:
- Line of Fire may twist, turn, and go around corners.
- Cannot pass through Impassable spaces or Walls but can go around them.
- Can pass through other figures without targeting them.
- Burst:
- Targets all Foes within a burst template area.
- Your figure is the grey space on the template.
- Attack affects all Foes on the red spaces.
- Template can be rotated as long as your figure remains in the grey space.
Selecting Targets:
- Attack any Foes you can target up to the maximum number listed at the end of the Attack line.
- For Burst Attacks, the maximum number includes all Foes in the red spaces of the burst template.
- You do not need to attack every potential target.
- Never attack a Friendly figure.
Line of Sight:
- No line of sight mechanics; all figures are aware of each other.
- Ranged Attacks can shoot around corners.
- Heroes and Foes are skilled, capable of trick shots.
Determine Damage
Rolling Damage Dice:
- After declaring targets, roll the listed number of yellow Damage Dice.

Some Attacks do not deal variable damage or have a fixed damage bonus. If an Attack deals a specific amount of damage , then that is the total damage for the Attack, and no Damage Dice are rolled. If the Attack has dice with a modifier, then you will first roll Damage Dice and then add the modifier to your total damage.
Damage Boost

- Use Power Tokens to add extra damage.
- Discard tokens to add +1 for each token discarded.
Deal Damage:
- Assign damage tokens equal to total damage to each target’s tracker card.
- Full damage is applied to each target if attacking multiple Foes.
- Applying damage triggers Harm effects, if any.
Harm Effects:
- Target-Specific:
- Effects apply to each target damaged by the Attack.
- General:
- Effects apply once, regardless of the number of targets damaged.
- Harm effects are negated if damage is prevented or if the target has an ability to “Avert Harm.”
- In Scenario 1, Schemers cannot prevent Harm effects.
Defeat Your Foe:
- After resolving Harm effects, Defeat Foes with damage equal to or greater than their Fortitude.
- Remove defeated figure from the map.
- Return tokens on its tracker card to the supply.
- Shuffle tracker card back into its tracker deck.
- Keep the figure nearby for potential redeployment later.
Maneuvering Heroes
- Moving Your Hero:
- Use abilities with Move and Leap effects to explore and fight.
- Move Effect:
- Move up to X contiguous spaces.
- Can stop movement at any time or not move at all.
- Must end in an Unoccupied space.
- Leap Effect:
- Move up to X contiguous spaces, ignoring intervening spaces.
- More freedom than Move.
- Can stop movement at any time.
- Must end in an Unoccupied space.
- Move Specifics:
- Allowed:
- Enter spaces with Friendly figures.
- Backtrack onto previously entered spaces.
- Required:
- Spend an additional point to enter Difficult spaces (yellow border).
- Activate Traps and Hazards in spaces entered.
- End movement in an Unoccupied space.
- Not Allowed:
- Enter spaces with Foes.
- Enter Impassable spaces (purple border).
- Move through Walls.
- Allowed:
- Leap Specifics:
- Allowed:
- Enter spaces with any figure, Friend or Foe.
- Backtrack onto previously entered spaces.
- Enter Difficult spaces (yellow border) at no extra cost.
- Pass through spaces with Traps and Hazards without activating them.
- Required:
- End movement in an Unoccupied space.
- Not Allowed:
- Enter Impassable spaces (purple border).
- Move through Walls.
- Allowed:
- Traps:
- Dangerous spaces dealing damage to entering figures.
- Interrupt movement to deal Trap’s damage and remove Trap token.
- If not Defeated, resume movement.
- Trap damage equals the number of damage tokens placed on it when set up.
Moving Other Figures
Forced Movement Effects:
- Allow you to change positions of other figures, including Foes.
- Typically result from Attacks but can come from other abilities.
Types of Forced Movement:
- Grab:
- Places the target adjacent to the user.
- Target does not pass through spaces between start and end points.
- Requires an adjacent Unoccupied space for the Grabber.
- If placed on a Trap, the Trap deals damage to the Grabbed figure.
- Pull X:
- Drags the target closer to the user.
- Moves along the shortest path until adjacent or has moved X spaces.
- Moves through Difficult spaces without penalty.
- Blocked from entering Occupied or Impassable spaces or crossing Walls.
- Takes damage from any Traps moved through.
- Push X:
- Shoves the target away from the user.
- Moves one Unoccupied space at a time further away until it can no longer move or has moved X spaces.
- Moves through Difficult spaces without penalty.
- Blocked from entering Occupied or Impassable spaces or crossing Walls.
- Takes damage from any Traps moved through.
- “You Move < X the target.”:
- Temporarily command the target to move.
- Move the target figure as though you controlled it.
- Target treats Friends as Friends and Foes as Foes.
- Must spend extra movement to enter Difficult spaces.
- Cannot enter Impassable spaces or cross Walls.
- Can move through Traps to deal extra damage.
Schemer Turns
Activation of Schemers:
- Schemers (Foes) take turns during the combat phase.
- Their aim is to defeat Heroes by resolving Schemes.
Scheme Blocks:
- Schemes are a series of effects similar to Hero abilities.
- Printed on the map in a Scheme Block.
- Multiple Schemes may be present in a Scheme Block.
Determining Schemes:
- Scheme to be used by each Schemer type is determined during the Ready Phase.
- Heroes should anticipate and plan for the Schemers’ telegraphed actions.
Resolving Schemes:
- Schemes are resolved top to bottom, one effect at a time.
- Follow the order of effects as listed in the Scheme Block.
Schemer Targeting
- Targets:
- Schemers treat Heroes as Foes and other Schemers as Friends.
- Some Scheme effects specify a target, which can be a figure or a Map Feature.
- Nearest Target:
- Defined as the Foe or space with the shortest direct Line of Fire, similar to a Ranged (`) Attack.
- Determine the shortest distance as if using a Ranged Attack.
Schemer Movement
- Move Effect:
- Resolved similarly to a Hero’s Move ability, with the same restrictions.
- Move the fewest steps possible to reach the target.
- Choosing Target Spaces:
- If multiple target spaces have the same number of steps, players choose the target space.
- Movement to Figures:
- If targeting a figure, the Schemer moves adjacent to it with the fewest steps.
- No penalty for using Ranged Attacks while adjacent to a Foe.
- Avoiding Dangerous Spaces:
- Schemers will avoid Dangerous spaces (e.g., Traps).
- This avoidance impacts the determination of their movement target.
Schemer Attacks
Attack Prioritization:
- Schemer Attack types define how targets are prioritized.
- Default targets are used unless the Scheme specifies differently.
Melee (Attacks:
- Target any adjacent Foe.
- If the Attack targets more than one Foe, target additional adjacent Foes up to the specified number.
- If multiple adjacent Foes, players choose which Foe(s) are attacked.
Ranged Attacks:
- Target the Nearest ( ~ ) Foe within Range.
- If multiple Foes are tied for Nearest, players choose which Foe is attacked.
- If the Attack targets more than one Foe, target the next Nearest ( ~ ) Foe.
- Continue adding targets until the maximum number of Foes is reached or no more Foes are in Range.
Player Decisions:
- Players decide which Hero is targeted when multiple targets are equally viable.
- Encouraged to make decisions in their best interest (e.g., directing attacks to more durable Heroes).
Damaging Heroes
- Schemer Attacks:
- Deal fixed amount of damage (no Damage Dice rolled).
- Heroes have ways to reduce or prevent damage.
- Modifying Damage:
- Weaken:
- Debuff Tokens that reduce attack damage.
- If an attacking figure has Weaken Tokens:
- Discard all Weaken Tokens before dealing damage.
- Reduce damage dealt to each target by the number of tokens discarded (minimum of 0).
- All Weaken Tokens are discarded regardless of the attack’s initial damage.
- Shield :
- Power Tokens that reduce damage taken from any source.
- If you have Shield Tokens:
- Before taking damage, discard Shield Tokens to reduce damage by 2 for each token discarded.
- Only reduces damage you suffer; other figures must use their own Shield Tokens to reduce their damage.
- Weaken:
By using Weaken and Shield Tokens effectively, players can mitigate the damage their Heroes receive from Schemer attacks and other sources, ensuring better survival and strategic advantages during gameplay.
Harming Heroes
- Schemer Harm () Effects:
- Resolve similarly to Hero Harm effects, with additional steps.
- For Scenario 1, two types of Harm effects:
- Push X:
- Moves the Hero one Unoccupied space at a time away from the Schemer.
- Continues until the Hero has moved X spaces or can no longer move further away.
- Players choose the path taken by the pushed figure.
- Traps:
- Gizmoblin Schemes can place Traps on the map near Harmed targets.
- Traps are placed as close as possible to the targets.
- If multiple legal Unoccupied spaces are available, players decide which space gets a Trap.
- Traps cannot be placed on spaces that already contain a Trap.
By understanding and anticipating these Harm effects, players can better navigate the map and manage their Heroes’ positions to minimize damage and avoid unfavorable situations during Schemer turns.
Fresh and Wounded Heroes
Hero States:
- Heroes start each scenario Fresh.
- Fresh side provides three repeatable abilities for movement, attacks, and recovery.
- Abilities on Fresh side are always available and never go on cooldown or run out of charges.
Taking Damage:
- Collect damage tokens on Hero mat.
- If damage equals or exceeds Fortitude (number in the heart, bottom left), the Hero becomes Wounded.
Becoming Wounded:
- Resolve any Harm () effects from the damaging attack.
- Pause any currently-resolving ability or Scheme.
- Return all damage tokens on Hero mat to the supply.
- Flip Hero mat to Wounded side.
- All damage tokens are removed when Wounded, regardless of excess damage.
Wounded State:
- New Fortitude value and abilities on the Wounded side of Hero mat.
- Many Heroes have a Reaction ability that triggers immediately when Wounded.
- After resolving Reaction ability, continue play (usually resuming Schemer’s turn).
- If Wounded on Hero’s own turn (e.g., stepping on a Trap), continue resolving interrupted ability.
Defeated Hero:
- Continue collecting damage tokens on Wounded side.
- If damage equals or exceeds new Fortitude, Hero is Defeated.
- In most scenarios, if any Hero is Defeated, players lose the scenario and the game ends.
Empowering Attacks and Defense with the Epic Pool
- Empower Your Attack:
- Before rolling Damage Dice, take any number of Epic Dice from the Epic Pool and add them to your roll.
- Epic Dice hit harder than normal Damage Dice but otherwise behave similarly.
- Note:
- You cannot generate new Epic Dice for the pool with an Empowered Attack.
- Ignore any icons rolled during an Empowered Attack.
- For fixed damage Attacks:
- Roll only the Epic Dice and add their damage to the fixed damage.
- You can Empower Attacks of any figure you control, including familiars (e.g., Zot can Empower Pooky’s Attacks).
- Empower Your Defense:
- Before a Schemer deals damage, discard any number of Epic Dice from the Epic Pool to reduce that damage.
- For each Epic Die discarded, reduce the damage dealt to all targets by
@. - If multiple figures are targeted by a Schemer’s Attack, each target receives the damage reduction.

Objective Phase
Overview:
- The Objective Phase is the last phase of each round.
- Check progress against unique Objectives and Win/Lose Conditions.
Lose Condition:
- If met, players lose immediately, even outside the Objective Phase.
- Scenario 1: Lose if a Hero is Defeated by the Schemers.
- No penalty for losing a scenario; set up and try again.
Objective:
- Checked to see if players should proceed to the next section of the scenario.
- Scenario 1: Check during the Objective Phase to see if the Objective is complete.
Win Condition:
- If met during the Objective Phase, players win.
- Win Conditions will be revealed over the course of the game.
The Maze of Madness
- Progression:
- After achieving Objectives in one section, continue to the next part of the scenario.
- Scenarios are divided into distinct Reinforce sections, spreading out enemies across different map areas.
- Reinforce:
- Details changes to the map and new Foe deployments.
- Scenario 1:
- Remove door tokens separating The Gauntlet from The Maze of Madness.
- Deploy new figures and tokens to indicated spaces in The Maze of Madness only.
- Use tracker deck to randomize figure locations.
- Reuse standees of previously Defeated figures if necessary.
- Return to the Scenario Book to read Lose Condition and Objective for this section.
The Room of Doom
- Final Stretch:
- New room with new challenges and enemies.
- Reveals Win Condition for the scenario.
- Reinforce:
- Three Schemer types to contend with.
- Read the Reinforce section in the Scenario Book.
- Add Foes and Traps to the board as before.
- Roll Scheme Dice separately for each Schemer Group, assigning them to appropriate Scheme Blocks.
- Add each Schemer Group’s initiative tokens to the bag.
- If all figures from a Schemer Group are Defeated:
- Do not roll Scheme Dice for them in subsequent Ready Phases.
- Do not add their initiative token to the bag.
- Win Condition:
- Win the scenario if conditions are met during the Objective Phase.
- All Heroes must survive until the Objective Phase.
- If a Hero is Defeated during the Combat Phase, you lose, even if the Win Condition is met.
- Scenario 1: There are two ways to meet the Win Condition.
Finishing Scenario 1
End of Scenario:
- Return to the Scenario Book to read the Lose and Win Conditions.
- If you win, continue reading in the Scenario Book.
- If you lose, restart the scenario and try again.
Post-Scenario Cleanup:
- Clear all damage tokens, Power and Debuff Tokens, Charge and Cooldown Tokens, etc.
- Return tokens to the supply.
- Heroes start fresh and fully healed at the beginning of each scenario.
Rewards Section:
- After the Epilogue, check the Rewards section in the Scenario Book.
- Indicates which cards to reveal from the Vault and add to Heroes and the shared Armory.
- Open shrinkwrapped Vault cards and take indicated cards.
- Reveal new cards and use them in subsequent games.
- Store remaining Vault cards in the box without looking at them for future unlocks.
Adding New Cards:
- Add new Hero cards to each Hero’s collection.
- Include new cards for all Heroes, even those not played this game.
- Create the Armory with all Item cards, including new Vault items and the six improvised items Heroes started with.
- Include Items from Heroes not played this game.
The Armory:
- Collection of Item cards available to Heroes at the start of each scenario.
- Customize Hero’s loadout by selecting Item cards at the start of each scenario.
- Store items together in a bag for future use.
- More details on using the Armory will be provided in Scenario 2.
Playing Scenario 2
Setting Up Under the Cellar
- Map Setup:
- Use the new map with unique features (maps are two-sided; check both sides).
- Instead of doors, use Gravel Wall tokens to divide rooms.
- Place Gravel Wall tokens to overlap adjacent spaces within the same outline.
- Schemer Setup:
- Prepare Schemer standees and their tracker decks as per the Setup table in the Scenario Book.
- Put indicated standees into the appropriate color base.
- Create tracker decks with the indicated number of cards.
- Note: Gizmoblins from Scenario 1 are now Glitchedmoblins with different behaviors.
Keywords
- Keyword Abilities:
- Found in the Scheme Block above the Schemer’s name.
- Recurring effects throughout the campaign.
- Brief descriptions in the Scenario Book; full explanations in the Glossary.
- Berserk Keyword:
- Makes Glitchedmoblins treat all figures as Foes, including other Glitchedmoblins.
- Moves toward the nearest Foe with the least movement.
- If multiple figures are equally close, players choose the target.
- Use Hero maneuvering to make Glitchedmoblins attack Slimes or each other instead of Heroes.
- Berserk is not symmetric: Slimes treat Glitchedmoblins as Friends.
Deploy
Choosing Difficulty:
- At the start of each scenario, choose a difficulty level.
- Use only the chosen difficulty’s rows on deployment tables for the rest of the scenario.
Difficulty Levels:
- Story:
- Fewer or weaker Schemers.
- Provides Heroes with additional advantages.
- Suitable for new players or those seeking a more relaxed, story-driven experience.
- Veteran:
- Base difficulty level for experienced players.
- Mistakes are punished but can be overcome with tactical play.
- Legend:
- Highly challenging with additional or stronger Schemers.
- Heroes face penalties and severe consequences for mistakes.
- Fine-tuning party composition and equipped cards is crucial.
- Introduces the red Doom Die.
Doom Die (Legend Difficulty):
- Forces strategic consideration in attacks.
- Roll the red Doom Die alongside yellow Damage Dice when determining damage.
- Results:
- Blank: No effect.
- Horns Icon: Choose one:
- Deal
!damage to the attacking Hero (cannot be prevented or avoided). - Discard a Damage Die of choice from the roll before rerolling any Critical Hits.
- Deal
- Critical hit rerolls do not include the Doom Die.
Hero Cards
- Ability Cards:
- At the end of Scenario 1, you unlocked 2 new ability cards for each Hero.
- Use all four ability cards for each Hero through Scenario 4.
- Starting in Scenario 5, choose which ability cards to equip.
Item Cards and the Armory
- Armory Setup:
- Combine Items from the start of Scenario 1 and those unlocked from The Vault.
- Items can be equipped by any Hero, while supplies last.
- Equip Items by placing them near the Hero mat; they become unavailable to others.
- Item Limitations:
- Each Hero can equip one Major Item and one Support Item.
- Cannot equip a second Support Item in place of a Major Item or vice versa.
- Setup Flags:
- Determine the number of Charge Tokens on Charge Abilities.
- Indicate what Power Tokens are received at the start of the game.
Power Tokens
- Types and Uses:
- Shield ( { ): Reduce any instance of damage by
@. - Damage Boost ( | ): Increase Attack damage by
!for each token discarded. - Evade ( [ ): Reposition after taking damage to avoid Harm () effects and Leap (
;) 2. - Toughness: Completely ignore one instance of damage and avoid any resulting Harm () effects.
- Shield ( { ): Reduce any instance of damage by
Power Tree
- Setup:
- Claim spaces on the Power Tree for bonus Power Tokens.
- Spaces must be either a gold-border space at the bottom or connected to already claimed spaces.
- For Scenario 2, claim one of the two gold-border spaces at the bottom.
- Transfer Power Tokens from the tree to the supply near your Hero mat.
- Choices on the Power Tree are not permanent and can be changed each game.
Zot’s Wizard Fire
- New Ability:
- Zot’s ability “A wizard rarely causes ‘spontaneous’ combustion” can place Wizard Fire tokens on the map.
- Wizard Fire tokens are Dangerous only to Foes.
- Heroes can move through Wizard Fire tokens freely.
- Foes will avoid spaces with Wizard Fire; if they enter or if Wizard Fire is placed in their space, they take
@damage. - Zot player should keep the Wizard Fire rules reminder card near their Hero mat.
Map Features
- Hazards:
- Permanent traps that remain on the map.
- Function similarly to regular traps but cannot be removed.
- Gravel Walls:
- Function like doors but require an Attack to open.
- Attack Gravel Walls to reveal new areas of the map.
- Attacking Gravel Walls:
- Treat Gravel Wall tokens as Foes during an Attack.
- Target either space a Gravel Wall covers.
- Harm () effects of your Attack are triggered before removing the damaged Gravel Wall.
- Removing Gravel Walls:
- Causes Reinforcement during the Combat Phase, as detailed in the Scenario Book.
Scenario Events
- Introduction:
- Scenario 2 includes your first Scenario Event.
- Events are described in the Scenario Book and trigger based on specific game states.
- Scenario 2 Event:
- Triggered if all Slimes are Defeated and the next room hasn’t been revealed.
- Avoid reading purple Scenario Event boxes unless instructed to do so to prevent spoilers.
By understanding and utilizing these new map features and being aware of the scenario-specific events, players can navigate the challenges of Scenario 2 more effectively. Return to the Scenario Book to read the Lose Condition, Objective, and additional details on how the Scenario Event is triggered, and begin your adventure!
Combat Phase Reinforcement
Revealing a New Room
- Pause and Reinforce:
- When a new room is revealed during the Combat Phase, the game pauses.
- Follow setup and deployment instructions for the newly-revealed room.
Deployment Rules for Newly-Deployed Schemers
- Same Type as Existing Schemers:
- Newly-deployed Schemers take their turn when their group’s initiative token is drawn.
- If their initiative token has already been drawn this Combat Phase, they do not take a turn this round.
- New Schemer Group:
- If the new Schemers are from a group not present at the start of this Combat Phase:
- Immediately roll a Scheme Die for the new group.
- Place the Scheme Die on the matching Scheme.
- Add the group’s initiative token to the bag.
- New Schemers will activate when their initiative token is drawn.
- If the new Schemers are from a group not present at the start of this Combat Phase:
- Initiative Token and Scheme Die:
- If newly-deployed Schemers belong to a new group, add their initiative token to the bag and roll a Scheme Die.
Deployment Adjustments
- Occupied Spaces:
- If a figure’s intended space is already Occupied, place it in the Nearest ( ~ ) unoccupied space.
- If multiple spaces are equally near, players choose the placement.
- Token Placement:
- Tokens of the same type cannot share the same space.
- If a token’s intended space is occupied by a token of the same type, place it in the Nearest ( ~ ) unoccupied space.
Maximum Schemers
- Limited Figures:
- If you run out of Schemers to deploy, do not place additional Schemers.
- The specified letter does not get a Schemer if all figures of that type are already on the map.
Resuming Combat Phase
- Continue Play:
- After all setup and deployment steps for the new room are complete, resume the Combat Phase from where it was paused.
Continue the game until you reveal the final room – the Blob Room!
Reinforce the Blob Room
Unique Setup Features
- Gelatinous Blob:
- New Schemer with its own objective: escape the Blob Room and be in the Dripping Passage during the Objective Phase.
- Schemes include: “Move < 1 * Blob takes one step along a Safe path toward an Unoccupied space in the Dripping Passage.”
Gelatinous Blob Attributes
- Fortitude and Keywords:
- High Fortitude.
- Keywords:
- Immune to Acid: Cannot be damaged by acid.
- Immune to Traps: Cannot be damaged by traps.
- Massive: Special movement and interaction rules, detailed on page 5 of the Scenario Book.
- Toughness Tokens:
- Starts with 2 Toughness Tokens on its damage tracker card.
- Toughness Tokens allow the Blob to completely Ignore one instance of damage.
- When taking damage, a Toughness Token is removed instead, preventing any Harm () effects.
Special Lose Condition
- Blob Escape:
- If the Gelatinous Blob reaches the Dripping Passage during the Objective Phase, players lose.
Strategy and Tips
- Contain the Blob:
- Read the new Map Features section and accompanying Wizgille Tip for strategies.
- Focus on keeping the Gelatinous Blob contained to prevent it from reaching the Dripping Passage.
- Use tactical positioning and abilities to manage and defeat the Blob despite its immunities and Toughness Tokens.
Completing Scenario 2
- Victory and Defeat:
- If you lose, restart and try again.
- If you win, collect new loot and prepare for Scenario 3.
Playing Scenario 3
Setting Up the Grey Market
Scenario Overview
- Objective:
- Achieve Objectives before the clock runs out.
- Defend the Grey Market by finding Siege Jellies hidden across the map.
- Avoid being overwhelmed by defending Foes.
- Randomized Reinforcements:
- Use four lettered Randomization Tokens.
- Shuffle and place one face down in each of the four buildings in the map corners.
- Follow instructions in “Event: Surprise Enemies!”
- Initial Setup:
- Depending on difficulty and Hero count, start with some damage already dealt to the Grey Market.
- Deploy to the Grey Market spaces in the center of the board, outside of the four buildings.
- Place a Toughness Token on the tracker card for each Chitin Brawler deployed.
Event: Surprise Enemies!
- Revealing Buildings:
- Move Hero onto door tokens scattered across the map.
- Pause turn, remove door token and any other door tokens from that building.
- Perform Combat Phase Reinforcement like in Scenario 2.
- Contents of each building are randomized.
- Randomizer Tokens:
- Reveal the Randomizer token for the building.
- Match token to one of four deployment tables in the Scenario Book.
- Deploy indicated Schemers and tokens.
- Roll Scheme die and add initiative token to the bag if the Schemer wasn’t on the map at the start of the Combat Phase.
- Movement Restrictions:
- Schemers, Pooky, and Eve’s Illusions cannot enter spaces containing doors.
- Heroes can Leap (
;) onto a door using an Evade Token when attacked. - Pause the current figure’s turn and Reinforce the building if revealed this way.
- Newly-deployed Schemers from the current acting group will only take a turn if their Initiative numbers are after the currently acting Schemer.
Playing Scenario 3
- Gameplay:
- Follow the Scenario Book instructions for detailed setup, deployment, and actions.
- Pay attention to the Win/Lose Conditions at the end of the setup instructions.
- Use strategic movement and combat to achieve objectives while managing time and reinforcements.
Transition to Scenario 4
- Next Steps:
- After completing Scenario 3, refer to the Scenario Book for Scenario 4.
- Prepare for the final Scenario of Chapter 1, which includes a Boss fight with the Crab King.
Setting up Scenario 4
Overview
- Scenario 4 Combines Lessons:
- Race against time to save the map from destruction.
- Destroy terrain to access new areas.
- Fight a big monster.
Map Setup
- Place Gravel Walls:
- Set up the map with Gravel Walls as per instructions.
- Temple Foundation Damage:
- Deal damage to the Temple Foundation based on difficulty and Hero count.
Oozing Fauna
- Deployment:
- Use the table to deploy Oozing Fauna in unrevealed areas.
- These Schemers activate during the Combat Phase despite being unrevealed.
- They deal damage to the Temple Foundation and may flood rooms with Traps.
Toughness Tokens
- Check for Icons:
- Ensure all Hardened Slimes and Chitin Guards are deployed with one Toughness Token on their damage tracker card.
Power Tree
- Claiming Spots:
- Claim a second spot on your Power Tree.
- Start with either gold-bordered spot at the bottom.
- Claim any connected spot or the second gold-bordered spot.
- Choose new paths for the Power Tree in each scenario.
- Adjusting Difficulty:
- As the campaign progresses, it will get harder, but more spots on the Power Tree will be available.
- Adjust the number of Power Tree spots for each player to tweak difficulty as needed.
Begin Playing
- Return to Scenario Book:
- Read the detailed instructions in the Scenario Book.
- Follow the setup and gameplay instructions carefully.
- Start playing and apply the strategies and lessons learned from previous scenarios.
Confronting the Crab King
Boss Characteristics
- Boss Mat:
- The Crab King uses a Boss Mat for his Schemes.
- Mat has both Fresh and Wounded sides.
- Initially deployed as Fresh.
- If damage taken is greater than or equal to Fortitude, the Boss becomes Wounded:
- Discard all damage tokens on the Boss Mat.
- Flip the Boss Mat to the Wounded side.
- Reroll the Scheme Die.
- Excess damage is ignored and does not carry over.
- Variable Toughness:
- Number of Toughness Tokens depends on difficulty and Hero count.
- Toughness Tokens added when the Boss is first deployed and again when Wounded.
- Extra Initiative Tokens:
- Bosses may have extra initiative tokens.
- The Crab King gets an extra initiative token at some Hero counts and difficulties.
- If the Crab King has an extra initiative token, reroll his Scheme Die after his first turn in a round.
Special Boss Abilities
- Activating Other Schemers:
- Some Schemers have Schemes that activate another Schemer.
- The Crab King’s “Master and Commander” Scheme:
- Activates the Crab King’s first Scheme (“Lordly Blitz”).
- Then activates the Nearest ~ Friend’s first Scheme.
- “Friend” refers to a Friend of the Schemer.
- Only the single Nearest ~ Friend activates, not the entire Schemer Group.
- If multiple Friends are equally close, players choose which one activates.
- Shield and Toughness:
- The Crab King can have both Shield Tokens and Toughness Tokens.
- If the Crab King would take damage and has both types of tokens:
- Discard a Toughness Token and keep Shield Tokens.
Strategy and Gameplay
- Defeating the Crab King:
- Follow the instructions in the Scenario Book to set up and confront the Crab King.
- Use strategic planning to manage the Crab King’s Toughness and Shield Tokens.
- Coordinate Hero actions to maximize damage and mitigate the Crab King’s Schemes.
- If you lose, reset and try again.
Finishing Chapter 1
Congratulations!
- Completion:
- You have completed Chapter 1 of the campaign!
- As you progress, you will unlock more Hero and Item cards to customize your loadout.
Archiving Cards
- Archiving Process:
- Unlock new cards from the Vault and may be instructed to Archive certain cards.
- Archived cards are removed from the game permanently and placed into the Archive.
- Use the back of the Vault box to store the Archive.
- Archived cards are replaced with new, more powerful versions of those cards.
Replaying Scenarios
- Replay Option:
- It is possible to replay earlier scenarios.
- Optional: Rewind your Vault and Hero cards from the Archive to their state at that point in the campaign.
- This allows you to experience the scenario as you would have at that time.
Hero Card Selection
- Choosing Hero Cards:
- From now on, each Hero will have more than four Hero cards to choose from.
- During setup for future scenarios, select four Hero cards to use.
- Your choice of Hero cards is not permanent; experiment and alter choices based on the scenario’s needs.
Continuing the Campaign
- Further Adventures:
- More surprises and challenges await in the campaign.
- Scenario Books and Reference Manual will guide you through future chapters.
- Upon completing a chapter, open the next chapter’s pack to proceed.